September 3, 2015

OMD (Check_MK) Alert Notification Integration with PagerDuty Done Right

enter image description here
Yes, shit just hit the fan. What are you gonna do?

If you are thinking about integrating OMD or Check_MK alert notification with PagerDuty.com, you are in the right place. The official documentation from PagerDuty is not done right by the Flexible Notification feature provided with OMD (Open Monitoring Distribution) or Check_MK.

If you don’t know what Flexible Notification is or what OMD is about, I recommend you to check out my other blog post - The Best Open Source Monitoring Solution 2015.

Create Notification Service on PagerDuty

Step 1. Log in to PagerDuty as an admin user. Click Service under the Configuration menu option.
enter image description here

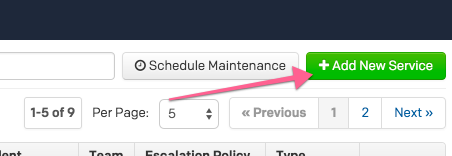
Step 2. Click the Add New Service button.
enter image description here

Step 3. Fill out the form as the arrows indicated in the following image.
enter image description here

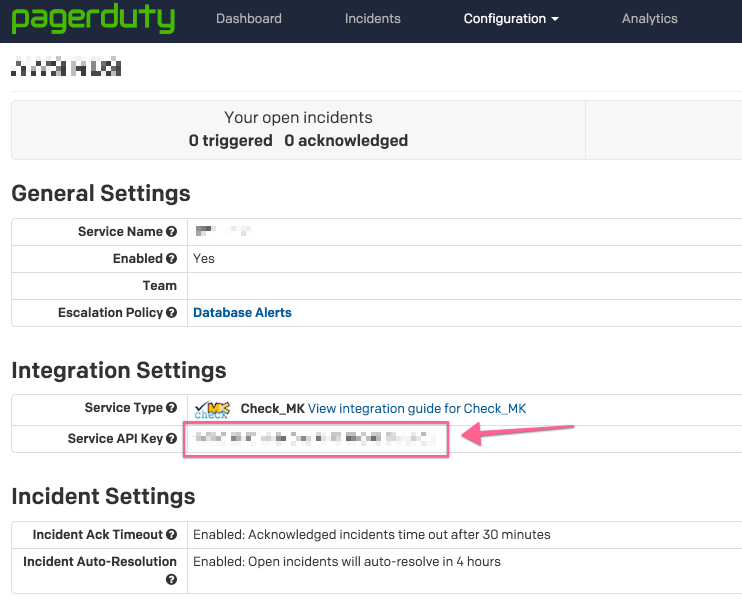
Step 4. Congratulations, we are done with the PagerDuty part. Grab the Service API Key for you are going to need it later.
enter image description here

Install PagerDuty Notification Script

Step 1. SSH into the OMD server

Step 2. Install Perl dependencies

FOR RHEL, Fedora, CentOS, and other Redhat-based distributions:

yum install perl-libwww-perl perl-Crypt-SSLeay perl-Sys-Syslog

For Debian, Ubuntu, and other Debian-based distributions:

apt-get install libwww-perl libcrypt-ssleay-perl libsys-syslog-perl

Step 3. Download pagerduty_nagios.pl from github, copy it to /usr/local/bin and make it executable:

wget https://raw.github.com/PagerDuty/pagerduty-nagios-pl/master/pagerduty_nagios.pl 
cp pagerduty_nagios.pl /usr/local/bin
chmod +x /usr/local/bin/pagerduty_nagios.pl

Step 4. Create cron job to flush notification queue
First become the OMD/Check_MK site user in shell, then create a cron.d file under /omd/sites/<<Site Name>>/etc/cron.d/pagerduty with the following content:

#
# Flush PagerDuty notification queue
#

* * * * * /usr/local/bin/pagerduty_nagios.pl flush

Now enable the cron job as the OMD site user:

omd reload crontab

Since the cron job runs every minute, you can change back to the root user and check to see if the cron job has been triggered as expected.

[root@omd.server.com ~]# tail -f /var/log/cron
Sep  4 08:25:01 omd.server.com CROND[24090]: (omd_user) CMD (/usr/local/bin/pagerduty_nagios.pl flush)
Sep  4 08:26:01 omd.server.com CROND[27175]: (omd_user) CMD (/usr/local/bin/pagerduty_nagios.pl flush)
Sep  4 08:27:01 omd.server.com CROND[30195]: (omd_user) CMD (/usr/local/bin/pagerduty_nagios.pl flush)

Integrate with OMD Flexible Notification

Assume you are still connected to OMD server with SSH.

Step 1. Adding custom Flexible Notification script
copy and save the following script to location /omd/sites/{YOUR-SITE}/local/share/check_mk/notifications/pagerduty.sh

#!/bin/bash
# PagerDuty

PAGERDUTY="/usr/local/bin/pagerduty_nagios.pl"

# For Service notification
if [ "$NOTIFY_WHAT" = "SERVICE" ]; then
    echo "$PAGERDUTY enqueue -f pd_nagios_object=service -f CONTACTPAGER=\"$NOTIFY_PARAMETER_1\" -f NOTIFICATIONTYPE=\"$NOTIFY_NOTIFICATIONTYPE\" -f HOSTNAME=\"$NOTIFY_HOSTNAME\" -f SERVICEDESC=\"$NOTIFY_SERVICEDESC\" -f SERVICESTATE=\"$NOTIFY_SERVICESTATE\""
    $PAGERDUTY enqueue -f pd_nagios_object=service -f CONTACTPAGER="$NOTIFY_PARAMETER_1" -f NOTIFICATIONTYPE="$NOTIFY_NOTIFICATIONTYPE" -f HOSTNAME="$NOTIFY_HOSTNAME" -f SERVICEDESC="$NOTIFY_SERVICEDESC" -f SERVICESTATE="$NOTIFY_SERVICESTATE"

# For Host notification
else
    $PAGERDUTY enqueue -f pd_nagios_object=host -f CONTACTPAGER="$NOTIFY_PARAMETER_1" -f NOTIFICATIONTYPE="$NOTIFY_NOTIFICATIONTYPE" -f HOSTNAME="$NOTIFY_HOSTNAME" -f HOSTSTATE="$NOTIFY_HOSTSTATE"
fi

Step 2. Make it executable

chmod +x pagerduty.sh

Step 3. Log in to OMD or Check_MK web interface and configure Flexible Notification to use the NEW PagerDuty notification script.

Assuming you already know how to operate Flexible Notification. Select PagerDuty as the Notification Plugin and put the API key you acquired earlier when setting up PagerDuty service into the Plugin Arguments field as shown in the image.
enter image description here

Since pagerduty_nagios.pl was designed to work with Nagios, it doesn’t take flapping notifications. Make sure you uncheck those boxes.
enter image description here
You can create multiple PagerDuty services and pair them up with OMD/Check_MK Flexible Notification. Happy ending.

Testing and Troubleshooting

Test pagerduty_nagios.pl

To send a test notification directly with the pagerduty_nagios.pl, use the following example and swap out <<API Key>> and <<HOST Name>> with your own value.

Make sure you become the OMD site user first because once you run the command once, it’s going to create a directly in /tmp/pagerduty_nagios. If you run the command as root now, you will have permission issue later when OMD is trying to send notification to PagerDuty with a different user.

/usr/local/bin/pagerduty_nagios.pl enqueue -f pd_nagios_object=service -f CONTACTPAGER="<<API Key>>" -f NOTIFICATIONTYPE="PROBLEM" -f HOSTNAME="<<HOST Name>>" -f SERVICEDESC="this is just a test" -f SERVICESTATE="CRIT"

You will be able to find output in syslog, and depend on the OS variation you use, location may vary.

If you get the following error message like I did:

perl: symbol lookup error: /omd/sites/<<site Name>>/lib/perl5/lib/perl5/x86_64-linux-thread-multi/auto/Encode/Encode.so: undefined symbol: Perl_Istack_sp_ptr

Add the following lines to the beginning of the PagerDuty Perl Script located /usr/local/bin/pagerduty_nagios.pl

use lib '/usr/lib64/perl5/';
no lib '/omd/sites/monitor/lib/perl5/lib/perl5/x86_64-linux-thread-multi';

Test with Flexible Notification

Step 1.
You first need to enable debugging for notification from the web UI. Enable setting in Global Settings -> Notifications -> Debug notifications. The resulting log file is in the directory notify below Check_MK’s var directory. OMD users find the file in ~/var/check_mk/notify/notify.log. Remember switch it back after you are done debugging.

Step 2.
Now pick a Host for Service that you’ve configure it’s notification to use the PagerDuty plugin, Click the Hammer icon on the top and click on Critical button in the Various Commands section.
enter image description here

Step 3.
Now log in to the PagerDuty account and select Dashboard form the top menu. In a minute or two, you should see some thing as shown in the image. If not, you need to go back to the log files and figure out why.
enter image description here

If you do see your fake incident appear on the PagerDuty dashboard, CONGRATULATIONS .

Share with us, comment on what notification mechanism do you use? Do you build it in-house or use a popular 3rd party service?

Read More...

July 17, 2015

Scale Selenium Grid in 5 Seconds with Zero Docker Experience

usability testing

The reason to use CoreOS as a Docker server is because CoreOS is an extremely light weight, stripped down Linux distribution containing none of the extras that are associated with Ubuntu and the like. And it was designed to run Docker and Docker clusters, so by using it we are buying the future.

Many cloud service provider already has CoreOS image to start with. If you are not going to be running the CoreOS server on bare metal or if you have other Docker server already installed, you can skip this step.

Install CoreOS on Bare Metal (Hardware)

Download the stable CoreOS ISO from here: Download Link

Then you can burn the ISO into a CD/DVD or a bootable USB disk and use it as the boot source to boot up your physical server.

Once the command line becomes available, create a cloud-config.yml file with the ssh-key you will be using to connect to the server from remote later. The content of the file should look like this:

#cloud-config

ssh_authorized_keys:
  - ssh-rsa AAAAB3NzaC1yc2EAAAADAQABAAABAQC0g+ZTxC7weoIJLUafOgrm+h...

CoreOS allows you to declaratively customize various OS-level items, such as network configuration, user accounts, and systemd units. This document describes the full list of items we can configure. The coreos-cloudinit program uses these files as it configures the OS after startup or during runtime.

Unlike AWS, cloud-config file is run during EACH system boot. While it is inspired by the cloud-init project, there are tools isn’t used by CoreOS. Only the relevant subset of its configuration items is implemented in CoreOS cloud-config file. Please refer to the official CoreOS document for detial on the subject.
cloud-config Documentation Link

Now run the install command with the cloud-config file name as argument:

coreos-install -d /dev/sda -c cloud-config.yml

Once you complete the above steps, reboot the server and make sure you remove your boot disk or boot CD/DVD. The server will boot up in command line mode and display it’s IP address obtained from DHCP server. From this point on, you can only ssh into the server via the ssh-key you provided earlier.

Install and Setup Docker Compose

Compose is a tool for defining and running multi-container applications with Docker. With Compose, you define a multi-container application in a single file, then spin your application up in a single command which does everything that needs to be done to get it running.

Docker Compose is the key component here to make spinning up or tearing down an entire Selenium Grid Farm (1 hub + multiple browsers) in a single command. Yes, you read it right, just ONE command. Installing Compose is a bit tricky though because of how CoreOS is built.

Here is the video that showed me how to install docker-compose on CoreOS toward the end of the video. You can skip the video because it’s 46 minutes long. And I will show you the exact steps on how you can do the same next.

Install Docker Compose

docker-compose is just a precompiled binary file we can download from its Github Page. Check out the link and choose the latest version number to replace in the following code (run as the default core user):

mkdir ~/bin
curl -L https://github.com/docker/compose/releases/download/1.3.3/docker-compose-`uname -s`-`uname -m` > ~/bin/docker-compose
chmod +x ~/bin/docker-compose
echo "export PATH="$PATH:$HOME/bin"" >> ~/.bashrc
source ~/.bashrc

Again if you are not using CoreOS, please follow the official installation instruction and skip the above code block.

Now the docker-compose command is ready for use, simply run docker-compose in shell, you should see the following:

core@localhost ~ $ docker-compose
Define and run multi-container applications with Docker.

Usage:
  docker-compose [options] [COMMAND] [ARGS...]
  docker-compose -h|--help

Options:
  -f, --file FILE           Specify an alternate compose file (default: docker-compose.yml)
  -p, --project-name NAME   Specify an alternate project name (default: directory name)
  --verbose                 Show more output
  -v, --version             Print version and exit

Commands:
  build              Build or rebuild services
  help               Get help on a command
...

Configure Docker Compose Application File

We’ll be using Docker images build by the official Selenium repository on Docker Hub, so you don’t need to build your own.

Under /home/core/ , create a file named docker-compose.yml with the following content:

hub:
  image: selenium/hub
  ports:
    - "4444:4444"
firefox:
  image: selenium/node-firefox
  links:
    - hub
chrome:
  image: selenium/node-chrome
  links:
    - hub

You can use other browser images in the Selenium repository in the docker-compose.yml file, and they should just work.

Manage Selenium Grid with Docker Compose

If you are running this for the first time, expect Docker to download all the necessary images in the beginning. Once all the images are downloaded into local repository, it will just take seconds to start the Selenium Grid in the future.

Start Selenium Grid

As user core, run:

docker-compose -f ~/docker-compose.yml up -d

By appending the -d argument at the end of the command, you are telling Compose to run the application in the background (daemon).

Sample output:

core@localhost /usr $ docker-compose -f ~/docker-compose.yml up -d
Recreating core_hub_1...
Recreating core_firefox_1...
Recreating core_chrome_1...

And you can verify it by running docker ps:

core@localhost /usr $ docker ps
CONTAINER ID        IMAGE                          COMMAND                CREATED              STATUS              PORTS                                                                         NAMES
a09d3ab302fa        selenium/node-chrome:latest    "/opt/bin/entry_poin   About a minute ago   Up About a minute                                                                                 core_chrome_1
298a612a387a        selenium/node-firefox:latest   "/opt/bin/entry_poin   About a minute ago   Up About a minute                                                                                 core_firefox_1
62136ab8fdb0        selenium/hub:latest            "/opt/bin/entry_poin   About a minute ago   Up About a minute   0.0.0.0:4444->4444/tcp                                                        core_hub_1

To see the real action in browser, open url http://your-coreos-IP:4444/grid/console

enter image description here

Scale Selenium Grid

Let’s say you need 5 Firefox browser and 5 Chrome browser in your Grid. Simply run:

docker-compose scale firefox=5 chrome=5

Sample output:

core@localhost ~ $ docker-compose scale firefox=5 chrome=5
Creating core_firefox_2...
Creating core_firefox_3...
Creating core_firefox_4...
Creating core_firefox_5...
Starting core_firefox_2...
Starting core_firefox_3...
Starting core_firefox_4...
Starting core_firefox_5...
Creating core_chrome_2...
Creating core_chrome_3...
Creating core_chrome_4...
Creating core_chrome_5...
Starting core_chrome_2...
Starting core_chrome_3...
Starting core_chrome_4...
Starting core_chrome_5...

And now your Selenium Hub management web page looks like this:
enter image description here

selenium grid with multiple browsers

Tearing Down Selenium Grid

Demolishing the entire selenium grid is just as easy as starting them. Since it only takes seconds to start, have a clean slate for all the Selenium tests is not a dream any more. You want all the browser to start without previous cookies or settings, and all is possible now with Docker containers.

docker-compose -f ~/docker-compose.yml stop && docker-compose -f ~/docker-compose.yml rm -f

Sample output:

core@localhost ~ $ docker-compose -f ~/docker-compose.yml stop && docker-compose -f ~/docker-compose.yml rm -f
Stopping core_chrome_1...
Stopping core_firefox_1...
Stopping core_hub_1...
Going to remove core_chrome_1, core_firefox_1, core_hub_1
Removing core_hub_1...
Removing core_firefox_1...
Removing core_chrome_1...

Integrate with Jenkins

Now to have it integrated with Jenkins for automated testing. I will update this when I have this setup in my environment.

Read More...

May 8, 2015

How to Clone a Live Production Linux Server with This Cool Technique

Do you find yourself stuck with some old Ubuntu Server that runs some critical application on a Physical Hardware which is running out of resources. You don’t want to waste rack space by cloning it to another physical server. You are a smart guy, you know cloning it to a VM gives you all the benefit of modern day server management.

live clone

What if the original hard drive has couple hundred Gigs of disk space and the actual data is only a few to a few dozen Gigs? You don’t want all that unused disk space to be also cloned into the VM via dd command. Is there a way to clone the server to a smaller disk that lives on a KVM VM guest? What if you can’t risk shutting down the physical server because it is in production and is a single point of failure? Look no further, here’s how you can live clone a old running Linux server to a KVM virtual machine.

Prepare New KVM Guest Image

Step 1. - Log in to your KVM host server and create a qcow2 image file with enough disk space to clone the actual data from the physical server:

qemu-img create -f qcow2 new-vm.qcow2 100G

Step 2. - Let’s attach the qcow2 file to a local device on KVM host so you can partition and format it.

mkdir /mnt/new-vm
modprobe nbd max_part=8
qemu-nbd -c /dev/nbd0 new-vm.qcow2
cfdisk /dev/nbd0
mkfs.ext3 -v /dev/nbd0p1

cfsidk - Create partition. Tailor this to your environment, instruction HERE.
mkfs.ext3 - Format the disk to ext3 filesystem. You can also use mkfs.ext4 or other type of filesystem depend on your situation.

Step 3. - Mount the drive

partprobe /dev/nbd0
mount /dev/nbd0p1 /mnt/new-vm

Clone Data from Physical Server

Step 4. - Rsync (Copy) all the files from the physical server
Do a dry run first.

rsync -e 'ssh -p 22' -avxn root@physical.server.com:/ /mnt/new-vm/

Now do it for real if you don’t see any problem with the dry run.

rsync -e 'ssh -p 22' -avx root@physical.server.com:/ /mnt/new-vm/

Step 5. - Sync data for the last time
Make sure all cached data are written to the hard drive on the physical server by running:

sync;sync;sync

Go back to the KVM host and do final rsync again

rsync -e 'ssh -p 22' -avx root@physical.server.com:/ /mnt/new-vm/

Clean up

Step 6. - Update disk UUID in GRUB bootloader
On the KVM host:

blkid

You will get a list of mounted drives UUID. Copy the one that follows /dev/nbd0. Use that value and replace all the disk UUID in /mnt/new-vm/boot/grub/grub.cfg

Step 7. - Clean up /etc/fstab
Do the same for /mnt/new-vm/etc/fstab and replace with the new UUID or just remove all UUID in the fstab file.

Step 8. - Clean up network settings

  • Change IP address by editing /mnt/new-vm/etc/network/interfaces
  • Remove cached mac address from udev. /mnt/new-vm/etc/udev/rules.d/70-persistent-net.rules
  • Edit any application settings that might create conflict with your physical server once you stand the new VM up.

Step 9. - Un-mount the drive

umount /mnt/new-vm
qemu-nbd -d /dev/nbd0

Stand Up the New VM

virt-install \
--connect qemu:///system \
-n vm-name \
--os-type linux \
--vcpus=2 \
--ram 2048 \
--disk path=/path/to/new-vm.qcow2 \
--vnc \
--vnclisten=127.0.0.1 \
--noautoconsole \
--import

Change the vm-name, vcpus, ram, and disk location to your liking. If everything go smooth, you should see these success messages on screen:

Starting install...
Creating domain...                                                                             |    0 B     00:01
Domain creation completed. You can restart your domain by running:
  virsh --connect qemu:///system start new-vm

You can now try to ssh into the new VM using the new IP and see if things are working. To troubleshoot any issue, you will need to use VNC to connect to your VM and debug accordingly. Congratulations! You’ve now save your company from a legacy dying server to the new, shiny, scalable, replicable, and testable VM. Now this is money ~~~

Read More...

January 21, 2015

Kamailio High Availability Done Right with Keepalived

enter image description here

Keepalived is a Linux implementation of the VRRP (Virtual Router Redundancy Protocol) protocol to make IPs highly available - a so called VIP (Virtual IP).

Usually the VRRP protocol ensures that one of participating nodes is
master. The backup node(s) listens for multicast packets from a node
with a higher priority. If the backup node fails to receive VRRP
advertisements for a period longer than three times of the
advertisement timer, the backup node takes the master state and
assigns the configured IP(s) to itself. In case there are more than
one backup nodes with the same priority, the one with the highest IP
wins the election.

I have ditched Corosync + Pacemaker for simpler and easily manageable cluster via Keepalived. Any of you who have played with Pacemaker will understand what I mean. I assume you’ve already got your Kamailio server installed and configured.

Install Packages

I am using Ubuntu server for the installation.

apt-get install -y keepalived sipsak

sipsak here will be wrapped in a check script to ensure Kamailio is still accepting SIP quests. VRRP is good for detecting network failure, but we also need something in place to check on the service level.

Set Kamailio to listen on VIP

Allow Kamailio to bind or listen to the VIP even when the VIP does not exist on the backup node. You first need to append the following to /etc/sysctl.conf

# allow services to bind to the virtual ip even when this server is the passive machine
net.ipv4.ip_nonlocal_bind = 1

Enable the setting immediately:

sysctl -p

Change Kamailio’s config file /etc/Kamailio/Kamailio.cfg to force Kamailio to listen on the VIP:

listen=<<VIP>>:<<Port Num>>

Apply the above to both severs, and restart Kamailio:

service Kamailio restart

Configure Keepalived

Create /etc/keepalived/keepalived.conf with the following content on both nodes

!Configuration File for keepalived

vrrp_script check_sip {
    script       "/etc/keepalived/checksip.sh"
    interval 5   # check every 5 seconds
    fall 2       # require 2 failures for KO
    rise 4       # require 4 successes for OK
}

vrrp_instance SBC_1 {
    state BACKUP
    interface eth0
    virtual_router_id 56
#   priority 100
    nopreempt
    advert_int 1
    authentication {
        auth_type PASS
        auth_pass somepassword
    }
    virtual_ipaddress {
        123.123.123.123/24 brd 123.123.123.255 dev eth0 label eth0:0
    }
    track_script {
        check_sip
    }
    notify_master "/etc/keepalived/master-backup.sh MASTER"
    notify_backup "/etc/keepalived/master-backup.sh BACKUP"
    notify_fault "/etc/keepalived/master-backup.sh FAULT"
}
  1. If you have multiple pair of Keepalived cluster running on the same subnet, make sure each pair’s vrrp_instance name and virtual_router_id number are different or else the failover will not work correctly.
  2. Comment out the priority so that the VIP won’t flap when a failed node comes back online. In other words, make the VIP sticky to the node it’s currently running on.
  3. Change the fall and rise interval under the vrrp_script check_sip according to your need. Once the script determined that Kamailio is down, Keepalived will failover the VIP to the backup server.
  4. Notification parameters at the bottom of the configuration:
    • notify_master - will be triggered on the server that is becoming the master server.
    • notify_backup - will be triggered on the server that is degraded to be a backup server or starting up as a backup server.
    • notify_faults - will be triggered when any of the vrrp check script reached it’s threshold and determines the service is no longer available, then the status will turn into faults and trigger the notify_faults script.

Apply the same configuration file on both the master and backup nodes.

Create Checking Script

There is no fencing mechanism available for Keepalived. If two participating nodes don’t see each other, both will have the master state and both will carry the same IP(s). When I was looking for a way to detect which one should stay the master or give up his master state, I discovered the Check Script mechanism.

A check script is a script written in the language of your choice which is executed regularly. This script needs to have a return value:

  • 0 for “everything is fine”
  • 1 (or other than 0) for “something went wrong”

This value is used by Keepalived to take action. Scripts are defined like this in /etc/keepalived.conf:

vrrp_script check_sip {
    script       "/etc/keepalived/checksip.sh"
    interval 5   # check every 5 seconds
    fall 2       # require 2 failures for KO
    rise 4       # require 4 successes for OK
}

As you can see in the example, it’s possible to specify the interval in seconds and also how many times the script needs to succeed or fail until any action is taken.

The script can check anything you want. Here are some ideas:

  • Is the daemon X running?
  • Is the interface X on the remote switch Y up?
  • Is the IP 8.8.8.8 pingable?
  • Is there enough disk space available to run my application?
  • $MYIDEA

Check out the Check Script Configuration Samples section on how to do some of those.

Create /etc/keepalived/checksip.sh and make sure it is executable.

#!/bin/bash

if ls /etc/keepalived/MASTER; then
    timeout 1 sipsak -s sip:s@10.10.10.10:5060
    exit
else
    exit 0
fi

This script will test SIP service on Kamailio’s private IP and make sure Kamailio is working on the Master node. I will explain how I use the /etc/keepalived/master-backup.sh to determine the master node in a little bit.

Notify Script

A notify script can be used to take other actions, not only removing or adding an IP to an interface. It can trigger any script you desire based on . And this is how it can be defined in the Keepalived configuration:

vrrp_instance MyVRRPInstance {
 [...]
 notify_master "/etc/keepalived/master-backup.sh MASTER"
 notify_backup "/etc/keepalived/master-backup.sh BACKUP"
 notify_fault "/etc/keepalived/master-backup.sh FAULT
}
  • notify_mater - is triggered when the node becomes a master node.
  • nofity_backup - is triggered when the node becomes a backup node.
  • notify_fault - is triggered when VRRP determine the network is at fault or when one of your check script has reached its fault threshold.

So with the above setting, we want to create the script in /etc/keepalived/master-backup.sh and make it executable:

#!/bin/bash

STATE=$1
NOW=$(date +"%D %T")
KEEPALIVED="/etc/keepalived"

case $STATE in
        "MASTER") touch $KEEPALIVED/MASTER
                  echo "$NOW Becoming MASTER" >> $KEEPALIVED/COUNTER
                  /etc/init.d/Kamailio start
                  exit 0
                  ;;
        "BACKUP") rm $KEEPALIVED/MASTER
                  echo "$NOW Becoming BACKUP" >> $KEEPALIVED/COUNTER
                  /etc/init.d/Kamailio stop || killall -9 Kamailio
                  exit 0
                  ;;
        "FAULT")  rm $KEEPALIVED/MASTER
                  echo "$NOW Becoming FAULT" >> $KEEPALIVED/COUNTER
                  /etc/init.d/Kamailio stop || killall -9 Kamailio
                  exit 0
                  ;;
        *)        echo "unknown state"
                  echo "$NOW Becoming UNKOWN" >> $KEEPALIVED/COUNTER
                  exit 1
                  ;;
esac

We rely on this script to start or stop Kamailio server. The reason I am not running active-active Kamailio HA is because is because if the backup Kamailio is running and sending probing to its load balancing targets, it will generate good amount of VIP errors continuous in the syslog file for the VIP it does not own yet.

I rather have a cleaner log file that I can use to troubleshoot later and sacrifice a few seconds waiting for the backup Kamailio to start.

Boot Sequence

As I mentioned, we don’t want Kamailio to start on boot on its own. We want Keepalived to manage the start and stop of Kamailio application. Here is how we disable Kamailio on boot:

update-rc.d -f Kamailio remove

The boot system on Ubuntu is currently messed up. Some application use Upstart and some application still use System V, there is no telling which upstart managed application will start first. But if you are using MySQL as the database for Kamailio, you will want to ensure MySQL is started before Kamailio. And because we are using Keepalived to control Kamailio, therefore we want MySQL to start before Keepalived when boot:

Disable Keepalived from starting via System V

update-rc.d -f keepalived remove

Create an Upstart script in /etc/init/keepalived.conf that will start Keepalived service after MySql server is started on boot:

# Keepalived Service

description     "Keepalived"

start on started mysql
pre-start script
  /etc/init.d/keepalived start
end script
post-stop script
  /etc/init.d/keepalived stop
end script

Restart Keepalived on both nodes when you are ready to :

service keepalived restart

Check Script Configuration Samples

Showcase different ways to check services:

vrrp_script chk_sshd {
       script "killall -0 sshd"        # cheaper than pidof
       interval 2                      # check every 2 seconds
       weight -4                       # default prio: -4 if KO
       fall 2                          # require 2 failures for KO
       rise 2                          # require 2 successes for OK
}

vrrp_script chk_haproxy {
       script "killall -0 haproxy"     # cheaper than pidof
       interval 2                      # check every 2 seconds
}

vrrp_script chk_http_port {
       script "</dev/tcp/127.0.0.1/80" # connects and exits
       interval 1                      # check every second
       weight -2                       # default prio: -2 if connect fails
}

vrrp_script chk_https_port {
       script "</dev/tcp/127.0.0.1/443"
       interval 1
       weight -2
}

vrrp_script chk_smtp_port {
       script "</dev/tcp/127.0.0.1/25"
       interval 1
       weight -2
}

How to incorporate the above checks into vrrp_instance configs:

vrrp_instance VI_1 {
    interface eth0
    state MASTER
    virtual_router_id 51
    priority 100
    virtual_ipaddress {
        192.168.200.18/25
    }
    track_interface {
       eth1 weight 2   # prio = +2 if UP
       eth2 weight -2  # prio = -2 if DOWN
       eth3            # no weight, fault if down
    }
    track_script {
       chk_sshd                # use default weight from the script
       chk_haproxy weight 2    # +2 if process is present
       chk_http_port
       chk_https_port
       chk_smtp_port
    }
}

vrrp_instance VI_2 {
    interface eth1
    state MASTER
    virtual_router_id 52
    priority 100
    virtual_ipaddress {
        192.168.201.18/26
    }
    track_interface {
       eth0 weight 2   # prio = +2 if UP
       eth2 weight -2  # prio = -2 if DOWN
       eth3            # no weight, fault if down
    }
    track_script {
       chk_haproxy weight 2
       chk_http_port
       chk_https_port
       chk_smtp_port
    }
}

For every set of VIPs, use a new vrrp_instance profile with unique instance name and virtual_router_id number. track_interface is optional for checking network interfaces, it will mark FAULT state if any of the interface goes down.

Monitoring with OMD or Check_MK

Ah ha, I knew you would ask. This section will come out later.

TCP Failover?

I have done my share of research work to find a solution to safely migrate established TCP connection from master node to backup node without success. It will be so cool to have SIP TCP session to stay alive during the failover. Even so, I am keeping my notes here for people who would like to give it a stab.

All the following effort seemed like working when I check the TCP session after failover but when I actually trying to verify the session, it fails. If anyone of you know anything that works, please do share with us in the comment section.

conntrack commands

conntack man page
Make sure you have the proper kernel modules enabled before any of the command can produce results for you. Run lsmod in Linux shell and see if the output contains the following results.

nf_conntrack_ipv4      19716  0
nf_defrag_ipv4         12729  1 nf_conntrack_ipv4

If you don’t have the above, try running modprobe ip_conntrack and retest the above.

Assume you have the above ready, you can use the following commands to validate connection session on the Linux server.

# List connection tacking or expectation table and display output in extended format
conntrack -L -o extended

# List connection tacking or expectation table
conntrack -L

# Display a real-time event log
conntack -E

Happy HA~

Special Thanks to These References:
https://tobrunet.ch/2013/07/keepalived-check-and-notify-scripts/

Read More...

July 19, 2014

Fake it till You Make it ep. 1 - Learn New IT Skills Like a Maniac

Remember the last time you need to pick up a piece of new technology or programming language among the other hundred thousand things you need to take care of? Well, it wasn’t pleasant was it. When I started learning about Linux, I wanted to be fast and know lots of command on top of my head. Years goes by, I realize my dream of wanting to be a COOL Sys Admin is slipping away because… until I found a solution toward the end of 2012.

enter image description here

The technique I am about to reveal not only help IT people but anyone who needs to deal with typing, emailing, documenting, and customer support all the time. If my technique is able to save you an average of 5 minutes a day, that is about 30 HOURS SAVED every year. That time saved can be used to learn one extra skill or free for whatever you want to do. Without further ado, check out my presentation below:

Sys Admin on Steroids

Let me know if you guys need some video demos to show how well it works in the comments area.

Read More...